Vanity Units
-

-

-
This product is in Stock and Ready to Ship

-

Modern Washroom design with Toilet Vanity Units
Installing a toilet vanity unit delivers incredible functionality. The design allows toilets and sinks to be bought together in one unit and provides additional storage for cleaning supplies, etc.
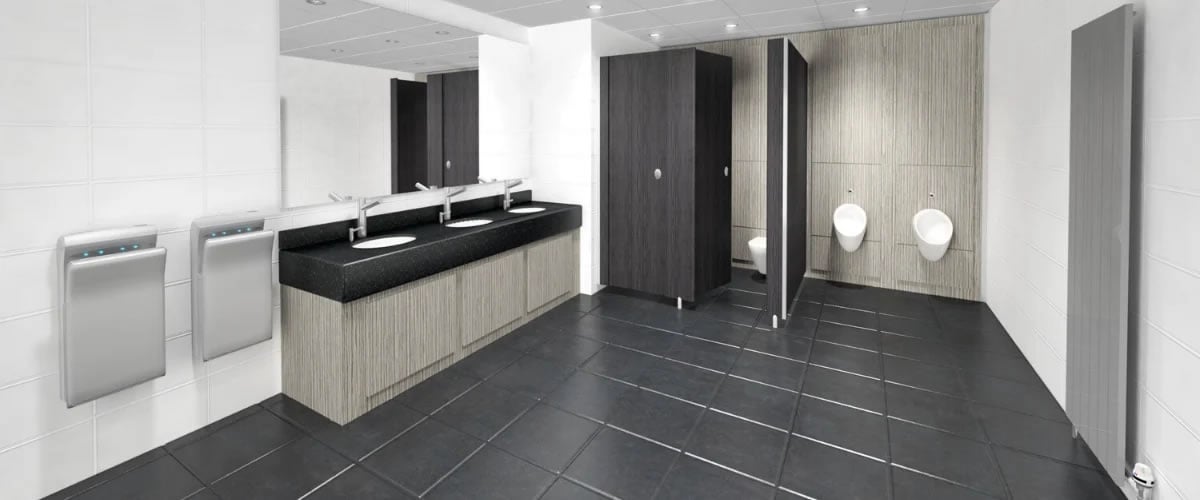
Enhance your Washroom with a Vanity Unit. From high-pressure laminate units to solid surface finishes such as Corian, we have vanity units manufactured from various materials and in multiple colours, allowing you to choose something that is in keeping with your washroom design.
We have vanity units for schools and young children, perfect for primary schools, nurseries, and all wash areas used by little ones. You can also choose from Communal Wash Troughs and solid-surface vanity tops with moulded basins. Our washroom vanity units are perfect for commercial settings, including public toilets, gyms, leisure centres, and much more. You could match your washroom area's design with a Bespoke Toilet Cubicle or Shower Cubicles.
For more information or help choosing which option is right for you, our team welcomes your call on 01202 650900, or you can contact us with general enquiries here.
Toilet Vanity Unit FAQ
What is a vanity unit?
A vanity unit is a countertop on which you can mount Washbasins and taps. It can also be extended to accommodate space for counter-mounted Baby Changing Units and toiletries. Many toilet vanity units are concealed using an underframe with easy-to-access panels below the countertop—this is a great way to hide unsightly pipework and provide extra storage and protection.
See also: What Is A Vanity Unit?
Do you tile behind a Vanity Unit?
Whether you should tile behind a vanity unit depends on the type of vanity unit you choose. For example, built-in vanity units hide the wall behind them, so there would not be a need to place tiles behind them. If, on the other hand, you decide you’d like to install a freestanding toilet vanity unit, you may be able to see behind it so that the tiling may look more polished.
Should you tile before or after installing your toilet vanity unit?
You don’t necessarily need to tile behind a toilet vanity unit; whether you want to tile before or after installing it will depend on your preference. That said, tiling after you have installed it means saving money (on tiles you don’t need because the vanity unit covers part of the wall), time, and effort.
How do you fit a Toilet Vanity Unit?
Note: If you’re not experienced or confident in installing vanity units, it may be best to hire a professional to avoid any damage, mistakes or wasted efforts.
Here’s how to fit a floor-standing vanity unit:
- Remove the old basin
- Firstly, you will need to remove the old basin. Before doing so, turn off the main water supply and disconnect the water supply for the hot and cold valves and the basin trap. If your previous unit was secured with caulking, you can remove it with a sharp tool such as a utility knife.
- Position the vanity unit.
- You will need a measuring tape to measure where the toilet vanity unit will go accurately. You should mark this area with a pencil to guide your next steps. Depending on whether your vanity unit has a back, you may need to drill some holes to insert pipes into the back of the unit. You must then ensure the vanity unit is fitted flat against the wall and free from obstructions.
- Fit the toilet vanity unit.
- You must first check that the pipes match the holes you have drilled (if you need to drill holes). You will then need to find the studs in the wall and screw the vanity unit into these once you’re happy with the fitting, fit in the mixer and waste.
- You can place a basin on top of the toilet vanity unit and bond it to the unit with silicone sealant.
- Ensure the vanity unit is firmly pushed to the wall before sealing it with more caulking. Once complete, turn the water supply back on and allow the water to run for a few minutes. You should check for any leakage now, but if everything seems to be flowing well, you have finished fitting your new vanity unit!
- Fitting a wall-mounted vanity unit differs from installing a floor-standing toilet vanity unit. Here’s how to fit a Wall-Hung Vanity Unit.
What height should a vanity unit be?
The height of your vanity unit will depend on who it is designed for. The typical height for a vanity unit is 32 inches; however, this will need to be shorter for use in Schools. Toilet vanity units should be 25 inches high for use in a preschool washroom, and for primary schools, they should stand approximately 29 inches from the ground.
See also: What height should a Vanity Unit be?
Benefits of Vanity Units
- There are many benefits of fitting a vanity unit into your washroom, including:
- They conceal pipework
- Concealing the pipework of your water systems can help prevent damage and make your commercial bathroom look clean and tidy. The toilet vanity unit will usually feature a panel that plumbers can remove so that the pipework can be easily accessed and fixed.
- Extra storage
- Some toilet vanity units also feature storage space for products such as toilet rolls, paper towels, or soap refills, making them very space-efficient.
- May feature a waste chute
- Some toilet and basin vanity units will feature a waste chute (built into the countertop), ideal for keeping washrooms clean.
- Available in different colours and materials
- Many vanity units will be made available in various colours and materials so you can match them with your washroom’s colour scheme.


