How To Change A Toilet Flush Kit

Automatic sensor flush kits are an incredibly popular upgrade across all commercial washroom settings. Because the toilet or urinal can be flushed by waving a hand in front of an infra-red sensor, it means users don’t actually need to physically touch any toilet controls. This significantly reduces the spread of bacteria by limiting touch points. Sensor flush kits are being used to improve the hygiene of commercial toilets everywhere from schools and hospitals, to pubs, restaurants and shopping centres.
How does a toilet flushing system work?
A sensor activated toilet flushing system works by mounting an infrared sensor on the wall above and behind the toilet. When a hand is waved in front of this sensor an electrical signal is sent to the control box, which in turn tells the cistern to empty, flushing the toilet. This is all done without the user ever needing to physicaly touch any flush controls.
What tools will the customer need?
As well as a core bit used to drill the opening on the IPS panel, you will also need a set of grips. For mounting the control unit and fused spur, you may need an SDS drill with fixings and plugs, as well as snips, electrical cable, and a series of screw drivers.
However, a word of warning needs to accompany this instructional guide. When we are installing a sensor flush kit we are dealing with live electricity and water and as such, professional skilled trades should be used for their installation to ensure absolute safety.
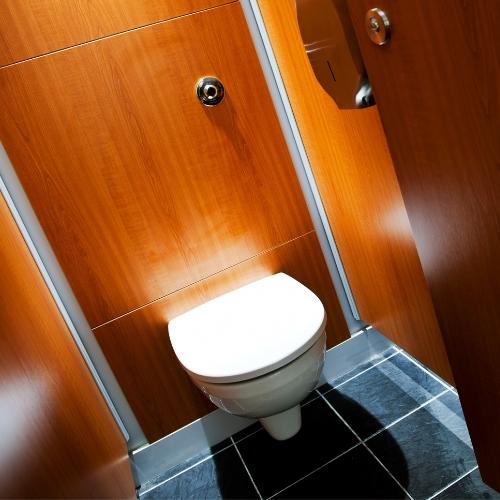
Sensor flush kits are best used with IPS DUCT sets. This is where a small false wall is created and all mains water, waste and electrics are concealed within a small void, and then panels are mounted to the front, on which your sanitaryware is fitted. Here, we break down the main steps to installing a DVS automatic sensor flush kit. As with any installation, check manufacturers specific instructions.
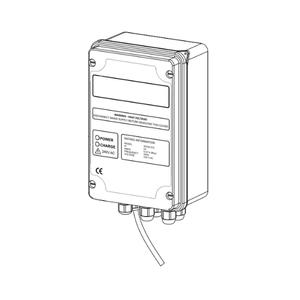
STEP ONE: Mount the control box
Once you have removed the front panels of your DUCT set, find a suitable location to mount the control box. This should be done by drilling and plugging holes before screwing the box to the wall. This control box can then be wired in via a 3amp fused spur. If you are working on a row of toilets, you can connect up to three control boxes to one 3amp spur.
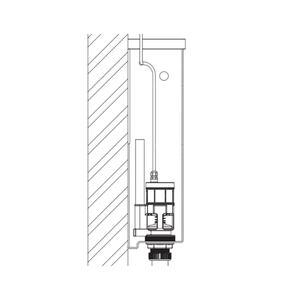
STEP TWO: The cistern and flush valve
Turn off the mains water feed to the cistern and drain completely. Ensure the cistern is clean and free from any debris that could affect seals. You can now fit the flush valve into the cistern using joint tape and the rubber seal provided, then secure in place with the back-nut provided. Next you need to route and secure the valve cable to a convenient position to connect to your control box - which should be no more than two metres away.
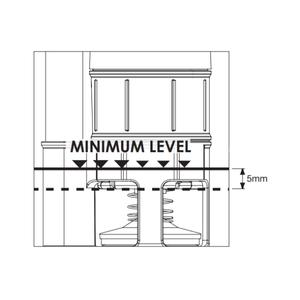
STEP THREE: Maximum and minimum water levels
When reconnecting and switching the water feed back on, you will need to make sure the maximum and minimum water levels are set correctly. The maximum water level should be below the overflow outlet as standard, this is usually done via a float. The minimum water level must be at least 5mm above the flush valve. If you do not ensure there is the water clearance above the flush valve, then flushing can become noisy and you may risk damaging the unit. You can control the minimum water level by adjusting the flush time on the control box. At this stage you should also check to make sure the cistern is filling correctly and that there are no leaks.
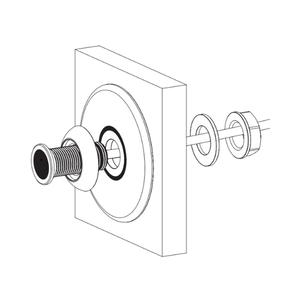
STEP FOUR: Fit Sensor
The toilet sensor needs to be fitted to a vertical service no more than two metres away from the control box. There is a back plate, bezel, washer and back-nut to secure this simple fitting. However, you can also fit this sensor into an existing manual operating flush hole if removing a push flush.
You can now secure your cables and make the appropriate connections back at the control box before switching on. A green LED light will show that the system is live, and the DUCT panels can be repositioned.
If you would like to know more about sensor activation in the washroom, or to find out about our specification, design and fit services, please get in touch with one of the team on 01202 650900.

